
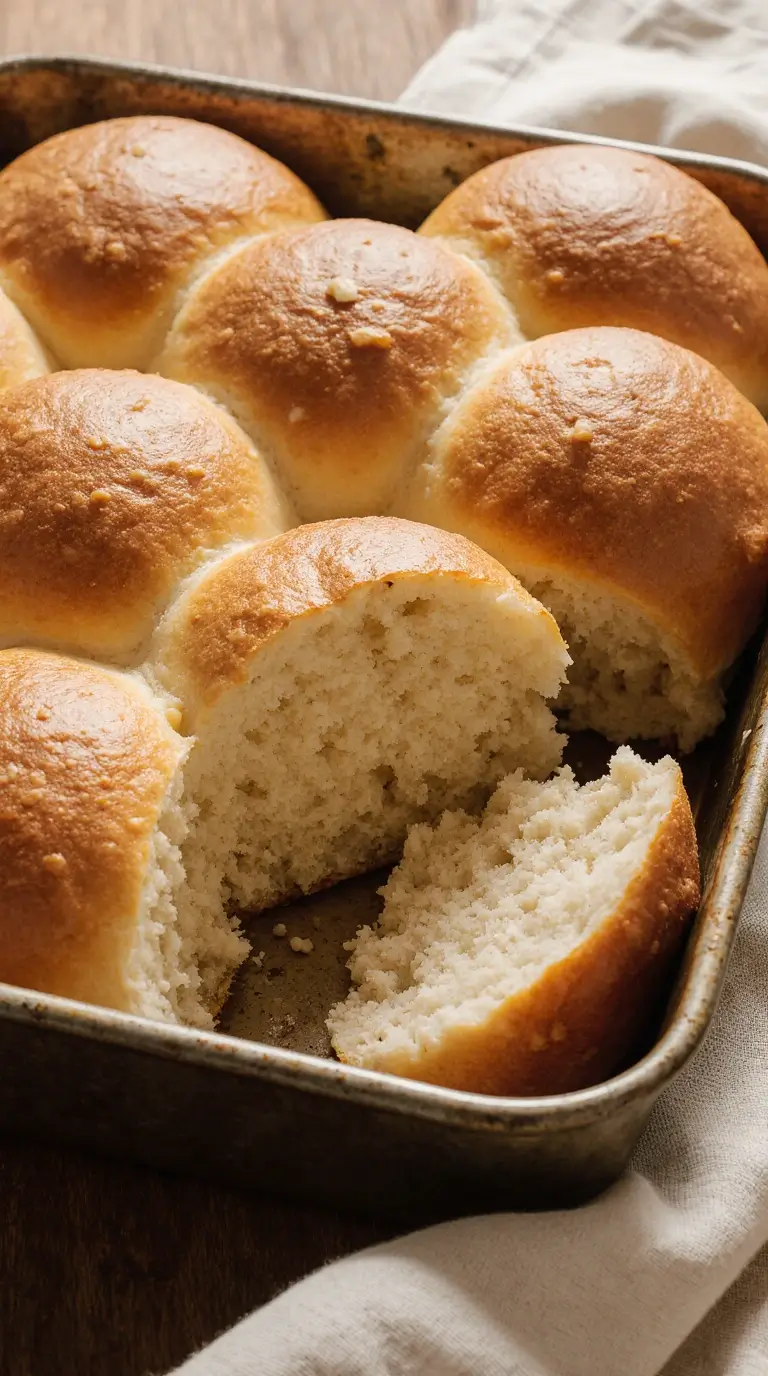
Walking into my grandmother’s kitchen always brings back childhood memories. The smell of freshly baked soft dinner rolls is like a time machine. It reminds me of the joy of pulling apart a warm roll and watching butter melt into its softness.
This easy dinner rolls recipe is perfect for anyone, whether you’re new to baking or have years of experience. Imagine serving golden, soft rolls that make everyone wonder if you made them yourself. With just seven simple ingredients, you can make restaurant-quality bread at home.
Get ready for a fun baking journey. It will improve your cooking skills and create delicious memories with these homemade dinner rolls.
Key Takeaways
- Discover a foolproof recipe for soft dinner rolls
- Learn professional baking techniques
- Create impressive homemade bread with minimal ingredients
- Perfect for both beginner and experienced bakers
- Impress family and friends with bakery-quality rolls
Essential Ingredients for Perfect Homemade Rolls

Making delicious dinner rolls starts with the right ingredients. These ingredients turn simple dough into golden, fluffy treats. The key is to choose the best parts that work well together.
The type of flour you pick is very important. It affects the texture and quality of your rolls. Knowing the difference can make your baking much better.
Choosing the Best Flour for Dinner Rolls
When picking flour for your rolls, you have two main choices:
- All-Purpose Flour: Great for home bakers
- Bread Flour: Makes rolls chewier and more robust
All-purpose flour is good for most home bakers. It makes softer, lighter rolls. Bread flour, with more protein, makes rolls chewier and more dense.
Choosing the right flour depends on the texture you want. Bread flour makes denser, more professional-style rolls. All-purpose flour makes rolls tender and soft.
Pro tip: Try both types of flour to find your favorite texture!
Other important ingredients for dinner rolls include:
- High-quality active dry yeast
- Whole milk for richness
- Unsalted butter
- Fine granulated sugar
- Salt to enhance flavor
Each ingredient has a special role in making those soft, delicious rolls. Your family will love them so much, they’ll ask for seconds.
Kitchen Tools and Equipment Needed
Making delicious homemade dinner rolls is easy. You don’t need a fancy bakery setup. Just a few key tools will help you make perfect bread at home.
Your basic baking tools should include:
- Large mixing bowl
- Measuring cups and spoons
- Baking sheet or round cake pan
- Kitchen towel for covering dough
- Pastry brush
A stand mixer can make baking easier, but it’s not necessary. Many people knead dough by hand. It’s a fun and rewarding process.
“The right tools make baking easier, but passion makes the bread delicious.” – Professional Baker’s Wisdom
Here are some optional tools to improve your baking:
- Digital kitchen scale for precise measurements
- Dough scraper for easy handling
- Instant-read thermometer
- Proofing basket
| Tool | Essential | Recommended For |
|---|---|---|
| Stand Mixer | No | Consistent kneading |
| Mixing Bowl | Yes | Dough preparation |
| Baking Sheet | Yes | Baking rolls |
Pro tip: Invest in quality tools that will last, but don’t feel pressured to buy everything at once. Start with basics and build your collection over time.
Making the Perfect Dinner Rolls Recipe
Making delicious dinner rolls is an art. It starts with knowing how to knead the dough right. It might seem hard, but with a few easy steps, you’ll make amazing rolls quickly.
Getting the dough just right is key for soft, fluffy rolls. Here are the main steps to knead like a pro:
- Start with room temperature ingredients for smooth mixing
- Mix until you get a shaggy dough
- Begin kneading on a lightly floured surface
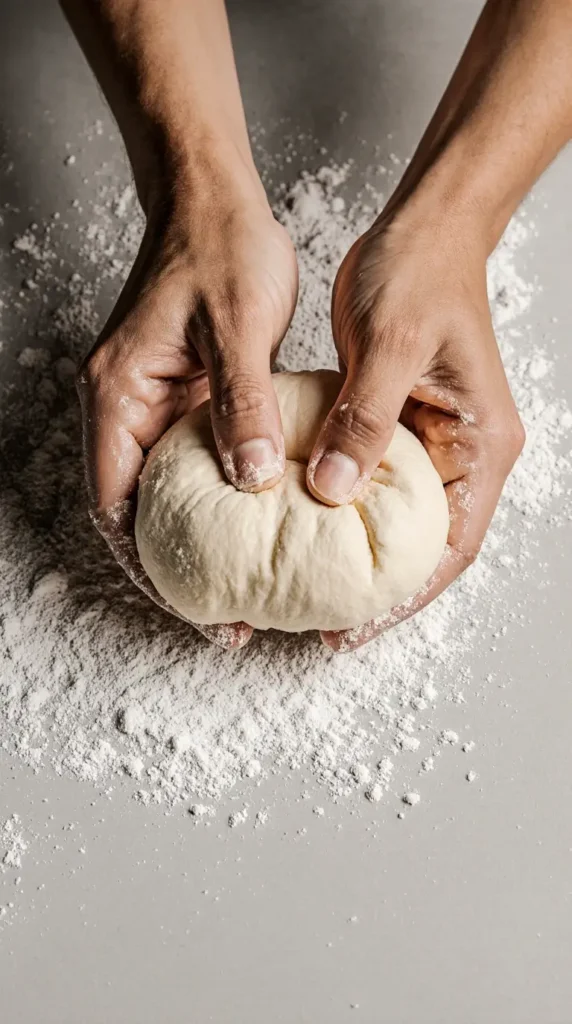
Mastering Kneading Techniques
When kneading dinner roll dough, aim for a smooth, elastic texture. Your kneading skill affects the roll’s softness and shape. Try for a surface that springs back when pressed gently.
- Knead for 5-6 minutes by hand
- Look for a dough that’s slightly sticky but easy to handle
- Don’t add too much flour, as it can make rolls dense
Pro tip: The perfect dinner roll dough feels soft and silky, not dry or too wet.
Practice makes perfect. Don’t worry if your first batch isn’t perfect. With each knead, you’ll get better at feeling the dough’s texture and needs.
Baking Tips for Golden Brown Results
Learning how to bake dinner rolls to a perfect golden brown is key. It’s all about mastering a few baking tips. These tips will help you make rolls that look as good as they taste.
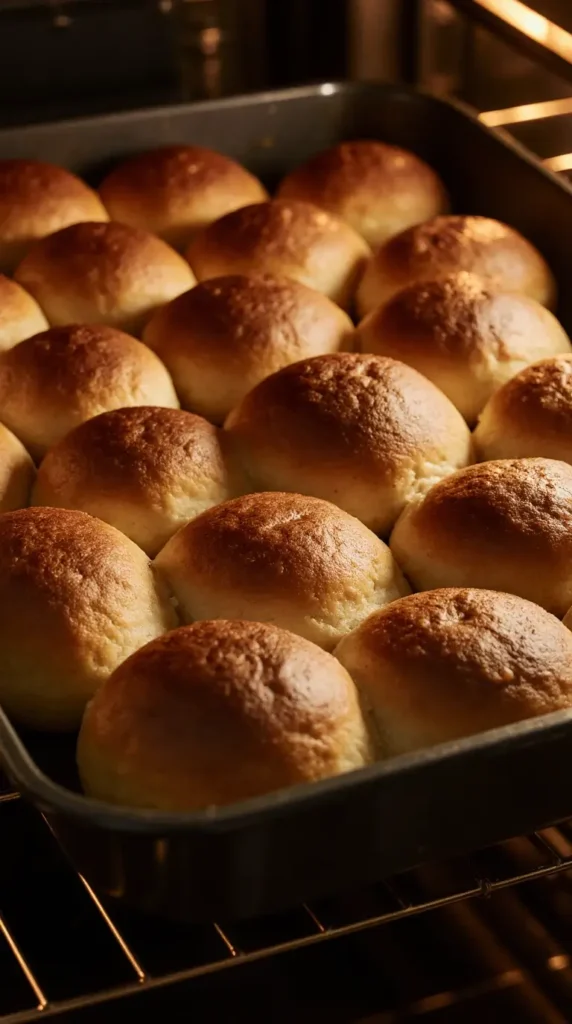
Begin by placing your oven rack in the lower third. This spot helps avoid over-browning and ensures even heat. Preheat your oven to 350°F (177°C). This temperature is perfect for golden brown rolls.
- Bake for 20-25 minutes until the tops turn a rich, golden color
- Check rolls halfway through baking to rotate the pan for uniform browning
- Look for a deep amber color that signals perfect doneness
Professional bakers have tricks for a golden look. Brushing the rolls with an egg wash before baking adds a stunning sheen. To make an egg wash, mix one egg with a tablespoon of water.
Watch your rolls closely in the last few minutes. If they’re getting too dark, cover them with foil. This keeps them from burning while they finish cooking.
Pro Tip: A perfectly baked dinner roll should sound hollow when tapped on the bottom and have a golden, crisp exterior.
By using these simple tips, you’ll make dinner rolls that are both delicious and beautiful every time.
Storage and Make-Ahead Instructions
Making delicious homemade dinner rolls is just the start. Learning how to store them right can make them last for days or weeks. Whether for a big family event or a quick snack, these tips will keep your rolls soft and tasty.
Fresh dinner rolls are best eaten within 2-3 days. To keep them soft and flavorful, follow these steps:
- Store cooled rolls in an airtight container at room temperature
- Wrap rolls individually in plastic wrap to prevent moisture loss
- Keep rolls away from direct sunlight and heat sources
Freezing Homemade Dinner Rolls
Freezing homemade dinner rolls is a great way to keep them longer. You can freeze them in two ways:
- Freezing Baked RollsAllow rolls to cool completely
- Wrap each roll tightly in plastic wrap
- Place wrapped rolls in a freezer-safe bag
- Freeze for up to 3 months
- Freezing Unbaked DoughShape rolls and place on a baking sheet
- Freeze until solid (about 2 hours)
- Transfer to a freezer-safe container
- Thaw overnight in refrigerator before baking
To enjoy your frozen rolls, thaw them at room temperature or in the fridge. Then, reheat in a 350°F oven for 5-10 minutes. This will make them warm and fresh again.
Common Mistakes to Avoid
Mastering dinner roll baking means knowing common mistakes. Troubleshooting is key for that perfect, fluffy texture. Let’s look at the top bread baking errors that can ruin your rolls.
Yeast is vital in bread, and using old or dead yeast is a big mistake. Always check the expiration date and test your yeast. Sprinkle it in warm water with sugar – if it doesn’t foam in 10 minutes, it’s time for new yeast.
- Temperature Troubles: Wrong water temperature can kill yeast or stop it from working
- Flour Finesse: Too much flour makes rolls dense and tough
- Kneading Challenges: Not kneading enough stops gluten from forming
- Rising Risks: Not rising enough makes rolls flat and heavy
Your dough’s environment is very important. Make sure it’s warm and draft-free for rising. A temperature of 75-80°F is best. Cover your dough with a damp cloth to keep it moist.
Pro tip: Patience is key in bread baking. Rushing the process can ruin your rolls’ texture and taste.
Watch for signs during baking. Sticky dough needs more kneading, and dry dough needs more liquid. With practice and attention, your dinner rolls will go from good to great.
Serving Suggestions and Variations
Turning basic dinner rolls into exciting dishes is simple. You can make your dinner rolls stand out with just a few tweaks. This way, you can impress your guests without much extra work.
With a few simple additions, your homemade dinner rolls can become something special. Flavored dinner rolls let you get creative and make your bread-baking unique.
Creative Flavor Combinations
Want to elevate your rolls? Here are some tasty ideas to try:
- Herb-Infused Rolls
- Rosemary and garlic
- Thyme and parmesan
- Basil and olive oil
- Cheesy Variations
- Cheddar and chive
- Gruyère and black pepper
- Blue cheese and walnut
- Sweet Dinner Roll Options
- Cinnamon sugar
- Honey lavender
- Maple pecan
“The secret to great dinner rolls is creativity and confidence in the kitchen.” – Professional Baker
When trying new dinner roll flavors, add mix-ins to your dough. Mix herbs, cheese, or sweet ingredients gently. Use about 1/4 cup of extra ingredients per batch for the best taste.
Shaping Techniques for Unique Rolls
Unique shapes can make your dinner rolls even more appealing. Try these methods:
- Cloverleaf rolls: Divide dough into three small balls per cup
- Parker House rolls: Fold each round in half
- Braided rolls: Separate dough into three strands and weave together
Pro tip: Brush your flavored dinner rolls with egg wash or melted butter before baking. This will give them a beautiful golden finish.
Conclusion
You’ve now mastered the art of making the best homemade dinner rolls. Your kitchen skills have grown from beginner to pro. You’re ready to bake delicious rolls that will wow everyone at the table.
The easy dinner roll recipe you’ve learned is more than just steps. It’s a key to gaining culinary confidence. Every batch of rolls you bake brings you closer to perfection.
Don’t worry about initial mistakes; each try makes you better. Your homemade dinner rolls will become a favorite among family and friends. The joy of freshly baked bread brings people together and creates lasting memories.
Baking is both a science and an art. Your patience, practice, and passion will show in every roll you make. Enjoy the journey, the process, and the delicious results of your hard work.
Your kitchen will soon be filled with the amazing smell of homemade bread. It speaks directly to the heart. Get ready to roll up your sleeves, preheat that oven, and become the bread-baking champion of your household. Your culinary adventure with the best homemade dinner rolls starts now!
FAQ
What’s the difference between all-purpose and bread flour for dinner rolls?
All-purpose flour makes softer rolls because it has less protein. Bread flour, with more protein, makes rolls chewier and more structured. For dinner rolls, all-purpose flour is best for a light, fluffy texture.
Can I make dinner rolls without a stand mixer?
Yes, you can make dinner rolls by hand. Knead the dough until it’s smooth and elastic. This usually takes 10-15 minutes of manual kneading.
How do I know when my dough has risen enough?
Use the poke test to check if your dough has risen enough. Press your finger about an inch into the dough. If the dent stays and doesn’t bounce back, it’s ready.
How long can I store homemade dinner rolls?
Store fresh dinner rolls in an airtight container at room temperature for 2-3 days. Freeze them for up to 3 months. Wrap them tightly in plastic or foil before freezing.
What causes dense or heavy dinner rolls?
Dense rolls can come from expired yeast, not enough rising time, too much flour, or not kneading enough. Use fresh yeast, give dough enough time to rise, and keep the right flour-to-liquid ratio.
Can I add flavors to my dinner rolls?
Yes! Add herbs like rosemary or thyme, grated cheese, garlic, or sweet ingredients like cinnamon and sugar. Mix them in during the initial dough mixing.
What’s the best way to get a golden-brown crust?
Brush rolls with an egg wash or melted butter before baking. Bake in a preheated oven at 375°F to 400°F. This will give you a golden-brown crust.
How can I tell if my rolls are fully baked?
Check for a golden-brown color and tap the bottom of a roll. It should sound hollow. Use an instant-read thermometer; the internal temperature should be about 190°F.
Can I make the dough ahead of time?
Yes! Prepare the dough in advance and refrigerate it overnight for the first rise. This can enhance flavor. Let the dough come to room temperature and complete the second rise before baking.
What’s the best way to reheat dinner rolls?
Wrap rolls in foil and heat in a 350°F oven for 5-10 minutes. For a quick method, microwave them for 10-15 seconds. This might slightly affect the texture.